

Boat electrical troubleshooting
Boat Electrical Troubleshooting: How to Find a Break in a 12V Circuit
By New Wire Marine Technical Team Updated October 2, 2026
You flip the switch. Nothing happens.
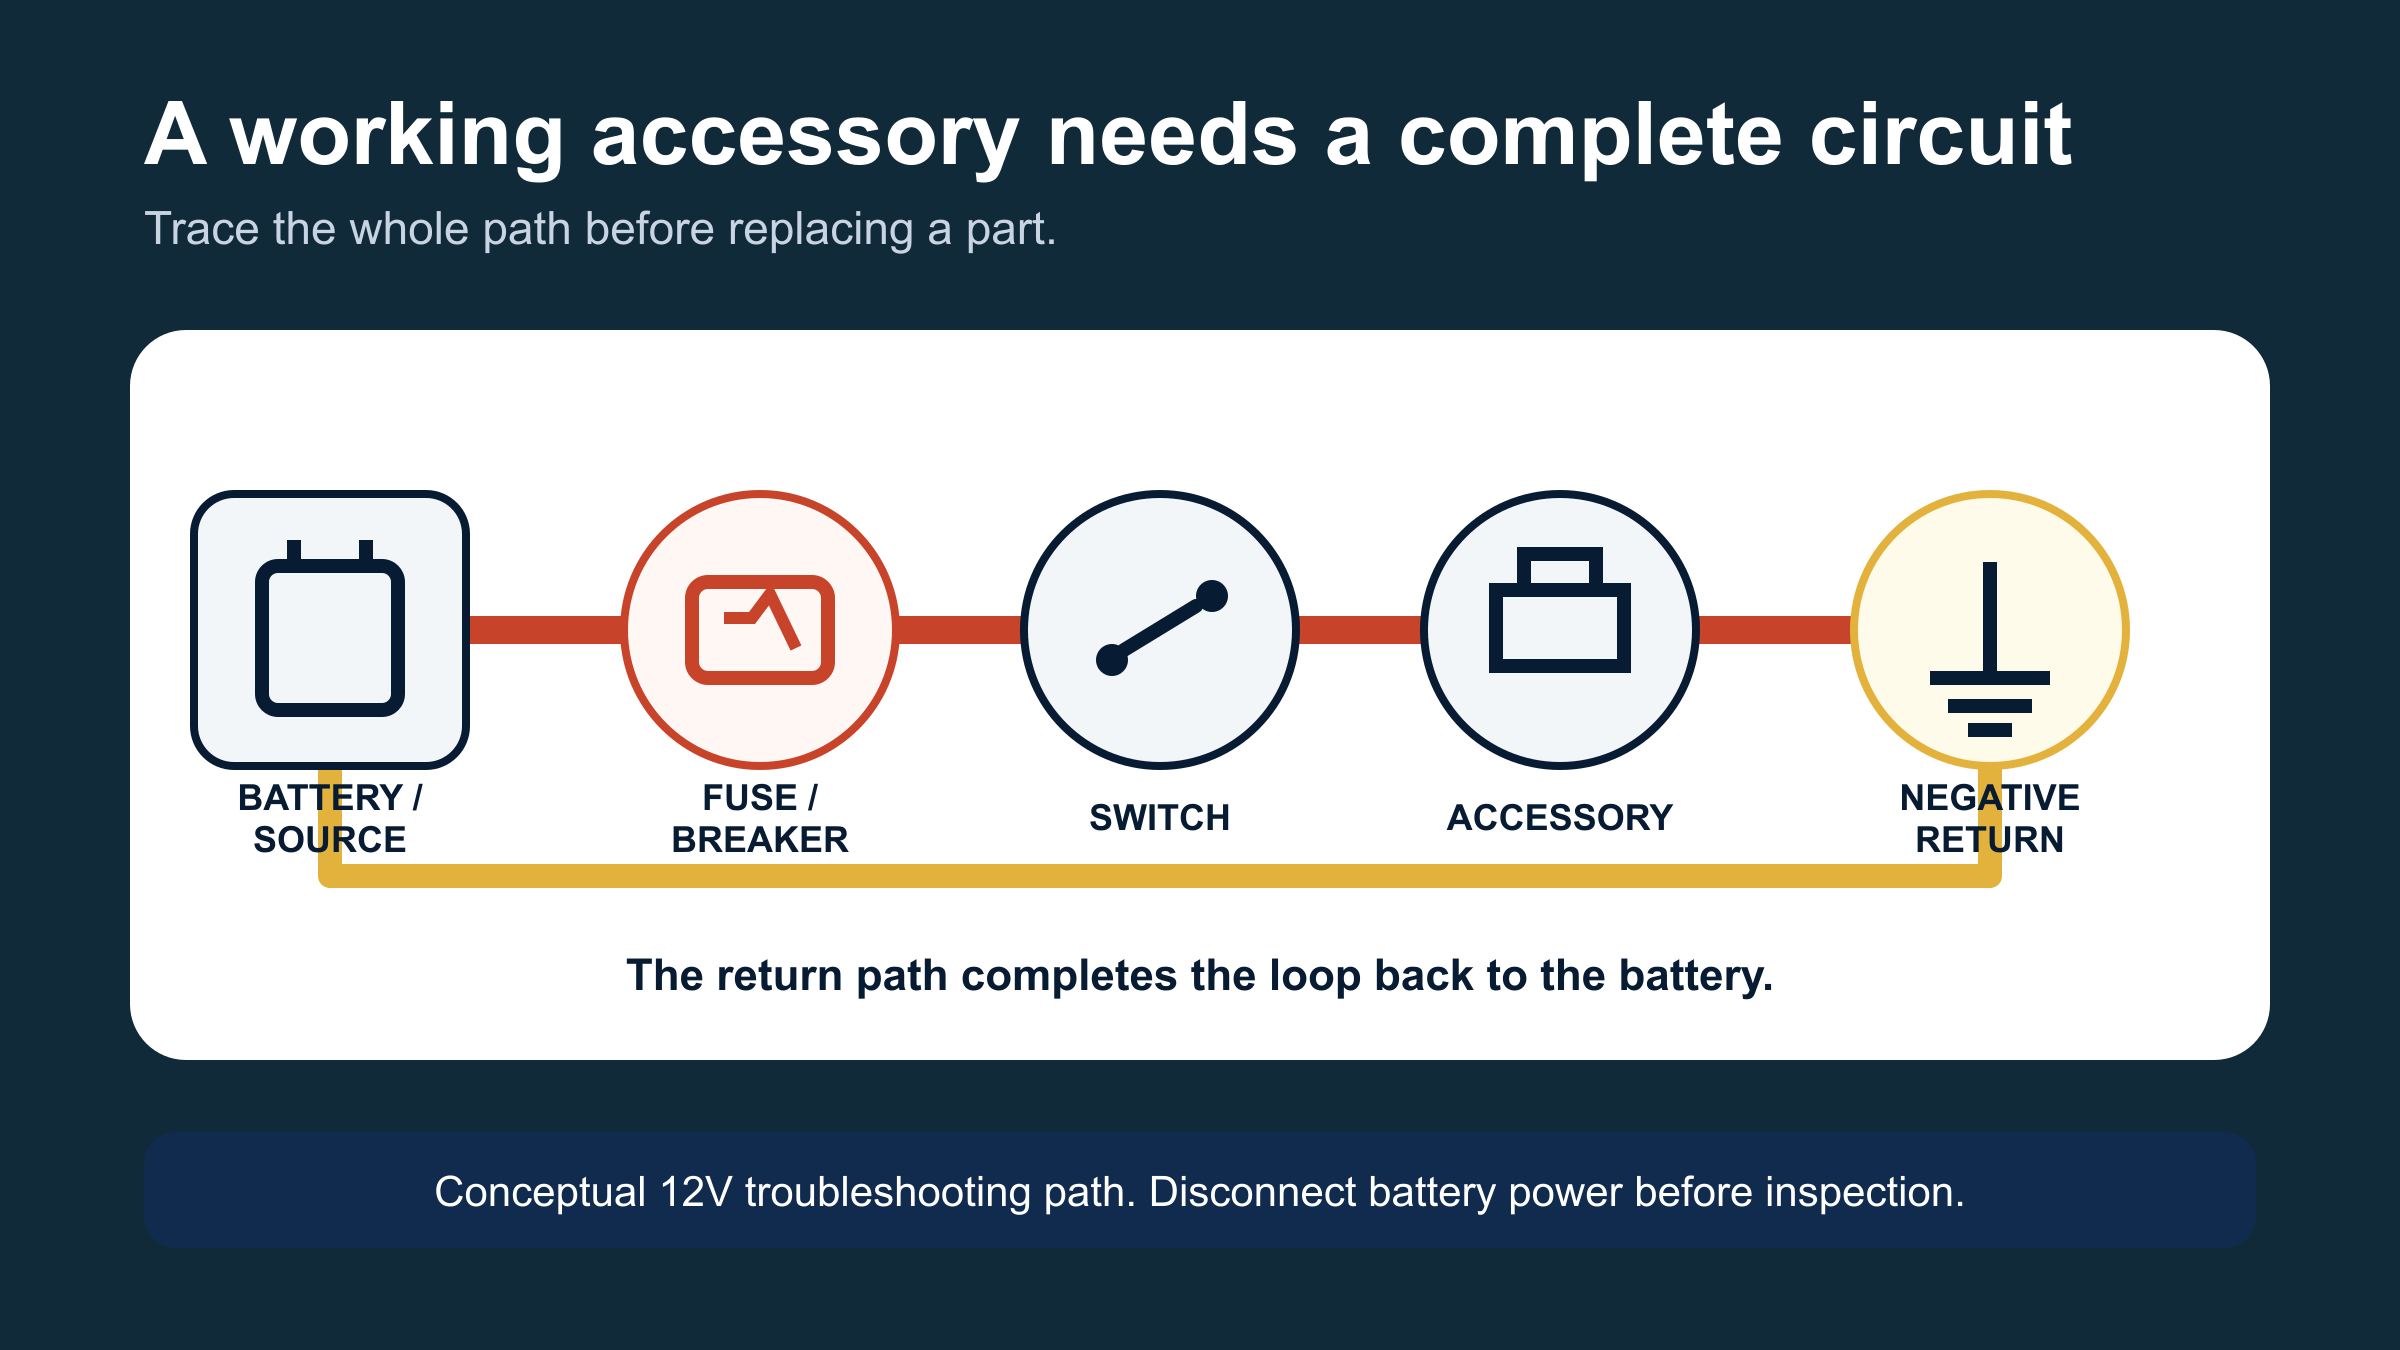
It is tempting to replace the switch, change the fuse, or assume the accessory failed. Before replacing anything, follow the complete path. One loose, damaged, disconnected, overheated, or corroded connection anywhere in the circuit can stop it from working.
The goal is to find the fault before you replace the part. That can save time, avoid replacing good components, and show you when the problem belongs with a qualified marine electrician.
Step 1
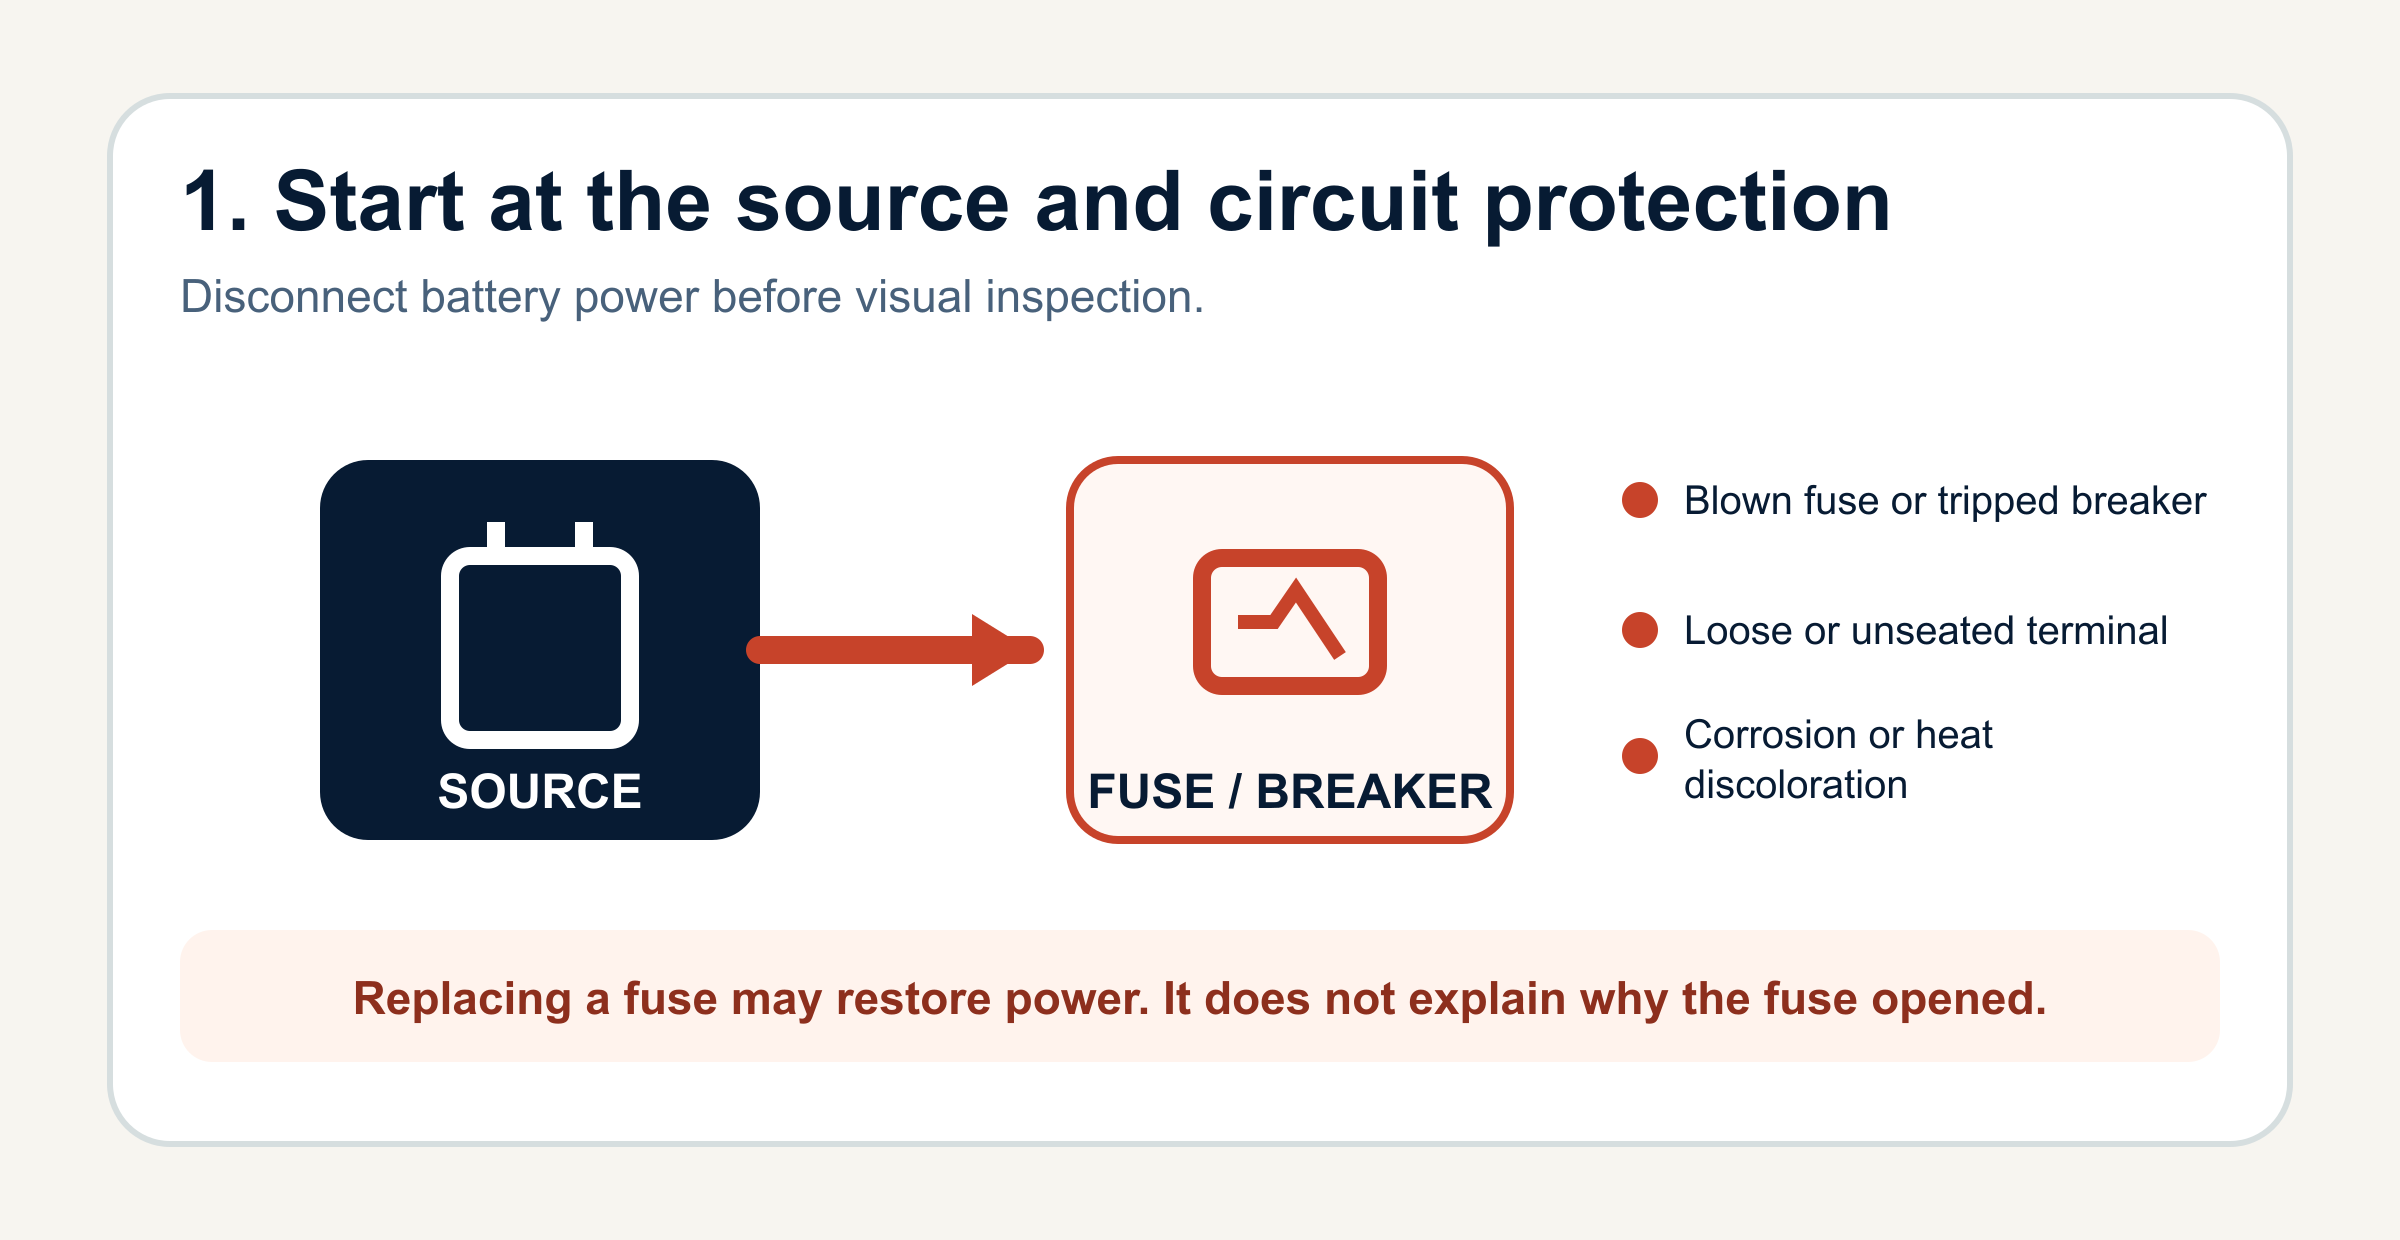
Start at the source and circuit protection
With battery power disconnected, locate the circuit’s positive source and the fuse or circuit breaker protecting it.
- Blown fuse or tripped breaker
- Loose cable or terminal
- Corrosion
- Heat discoloration or damaged insulation
- A terminal that is not fully seated
Replacing a blown fuse may restore operation, but it does not explain why the fuse opened. If the replacement opens again, do not keep replacing it. The circuit still has a fault.
Step 2
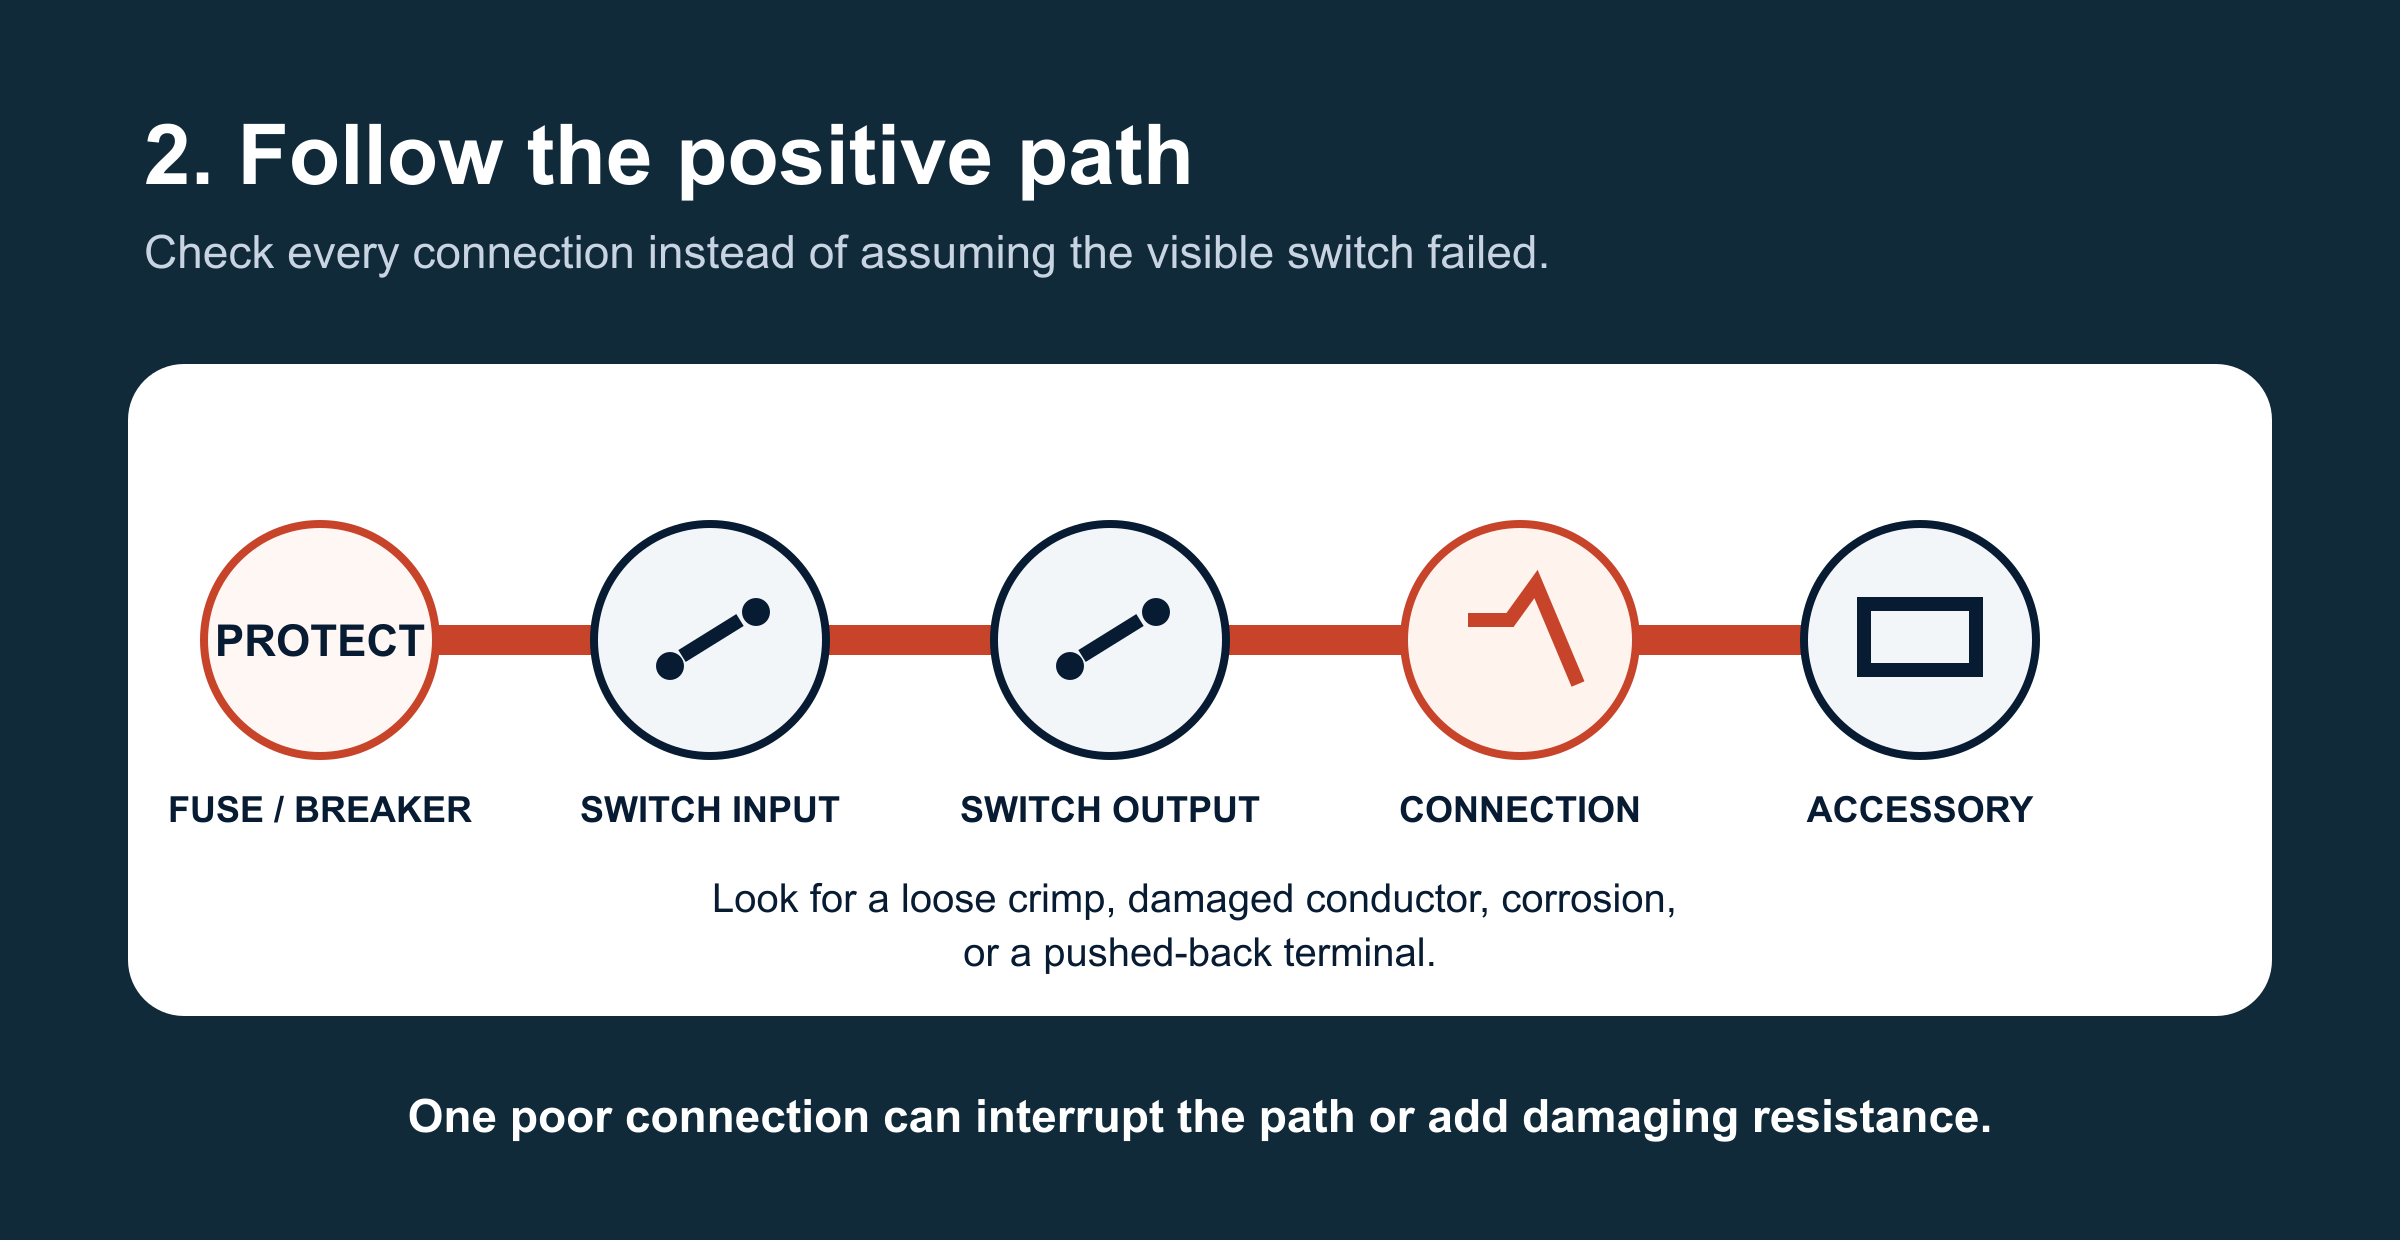
Follow the positive path
Trace the positive wire from the fuse or breaker to the switch, then from the switch to the accessory. Check each connection before deciding that the switch or accessory failed.
A loose crimp, damaged wire, corroded terminal, or pushed-back connector can open the circuit. A poor connection can also add resistance and reduce the voltage available at the accessory.
Step 3
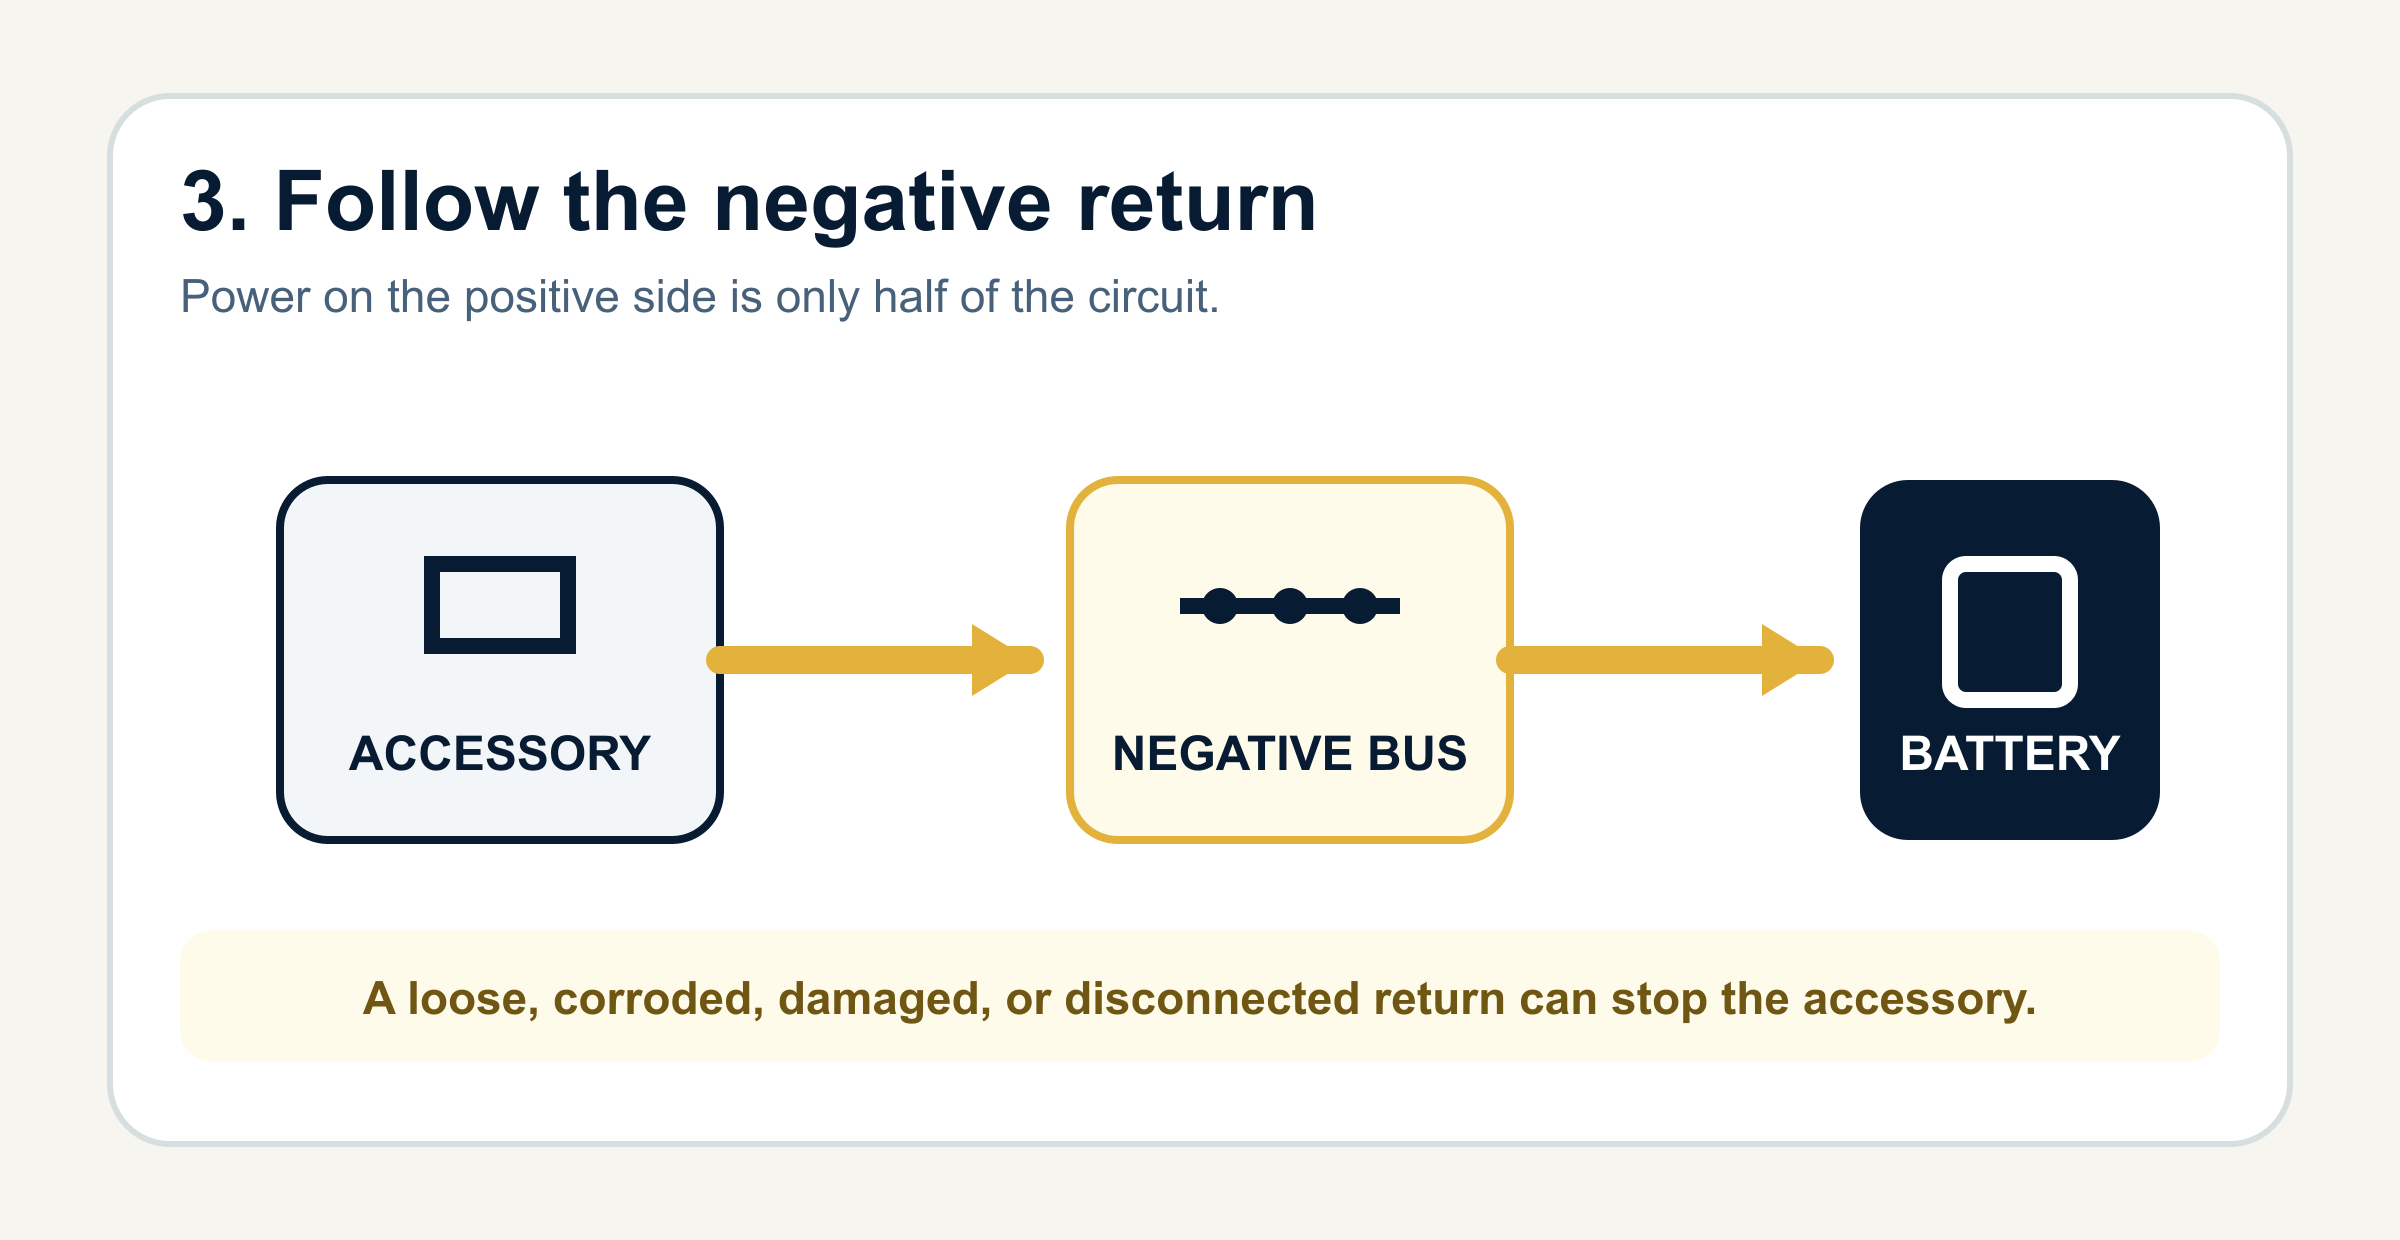
Follow the negative return
Do not stop after finding power on the positive side. The circuit still needs a complete path back to the battery.
Follow the accessory’s negative wire to the negative bus or battery connection. A dead accessory can have power at its positive connection while its negative return is loose, corroded, damaged, or disconnected.
Step 4
If the problem is not visible, a meter can help
Mark each point you inspect so you do not repeat the same work. If nothing obvious appears, a multimeter can help narrow down where the circuit stops.
Continuity can help determine whether an isolated, de-energized path is complete. Voltage testing on an energized circuit is different. If the wiring is unclear, does not match the diagram, shows heat damage, or requires testing you are not trained to perform, call a qualified marine electrician.
What the inspection may tell you
The circuit protection opened, but the underlying cause is not yet known. Inspect the rest of the circuit before treating the replacement as the repair.
The connection may be open or adding resistance. Isolate power and have the connection repaired correctly.
The negative return or the accessory may still be at fault. Trace the return before replacing the accessory.
The circuit may have undocumented changes. Stop guessing, document what you can see, and consult a qualified marine electrician.
A connection can be poor without being completely open
Corrosion, loose connections, conductor length, and wire size can affect the voltage available to the accessory. A circuit may look connected but still fail when the accessory tries to operate.
Common places to find the fault
- Battery or source connection
- Fuse holder or breaker terminal
- Connection behind the switch panel
- Loose crimp or pushed-back connector pin
- Damaged or corroded wiring
- Negative bus or battery-negative connection
- The accessory itself, after the circuit is checked
Follow the circuit before replacing the part
Start with the source and circuit protection. Follow the positive path. Trace the negative return. If the fault is not visible, use the correct meter test or get help from a qualified marine electrician.
Tools and materials for the project
Find the fault first. Then make the repair.
A multimeter can help narrow down where the circuit stops. If you find damaged wire or a failed connection, the correct stripping, crimping, and heat-shrink tools help you make a clean, reliable repair.
Meter reminder: Turn power off and isolate the circuit before using continuity or resistance mode. Energized testing requires the correct function, test points, procedure, and experience.


Frequently asked questions
Why did my 12V boat accessory stop working?
A dead accessory means its circuit is not operating correctly, but the symptom does not identify the failed point. Check the source, fuse or breaker, positive wiring, switch, accessory connections, and negative return as one complete path.
Can a boat accessory have power and still not work?
Yes. The positive side may have power while the negative return is loose, corroded, damaged, or disconnected. A poor connection can also reduce the voltage available when the accessory tries to operate.
Does a blown fuse mean the fuse was the problem?
Not necessarily. Replacing it may restore operation, but it does not explain why it opened. If it opens again, the circuit still has a fault.
Where should I start troubleshooting boat wiring?
Start at a known power source and the circuit protection. Follow the positive path through the switch to the accessory, then trace the negative return toward the battery.
Can I test continuity on a live 12V circuit?
No. Turn power off and isolate the circuit before using continuity or resistance mode. Energized testing requires the correct meter function, procedure, and experience.
When should I call a marine electrician?
Call a qualified marine electrician when the wiring is unclear, does not match the diagram, shows heat damage, repeatedly opens its protection, or requires testing or repair outside your experience.
Keep learning
How to Wire a Boat
New Wire Marine’s larger guide to 12V DC power distribution and the complete wiring path.
General Wiring Guides and Spec Sheets
Additional references for common wiring components and projects.
Components and Diagrams
Component-specific diagrams and supporting information.